
Mục đích bài viết giúp các bạn biết cách:
- Kết nối ví Metamask với dự án dApp
- Đọc, cập nhật dữ liệu từ hợp đồng thông minh bằng cách sử dụng API Alchemy Web3
- Đăng ký giao dịch Ethereum bằng Metamask
I. Demo
MetaMask kết nối đến smart constract để thực hiện read/update message
II. Implement
1. Tạo Smart Contract
pragma solidity ^0.8.13;

contract HelloWorld {
    // Emitted when update function is called
   // Smart contract events are a way for your contract to communicate
   // that something happened on the blockchain to your app front-end,
   // which can be 'listening' for certain events and take action when they happen.
   event UpdatedMessages(string oldStr, string newStr);

   string public message;

   // Constructors are used to initialize the contract's data.
   constructor(string memory initMessage) {
      message = initMessage;
   }

   function update(string memory newMessage) public {
      string memory oldMsg = message;
      message = newMessage;
      emit UpdatedMessages(oldMsg, newMessage);
   }
}
・Trước khi tạo smart contract cần 3 thông tin: API_URL, API_KEY, PRIVATE_KEY
API_URL = "https://eth-ropsten.alchemyapi.io/v2/your-api-key"
API_KEY = "your-api-key"
PRIVATE_KEY = "your-private-account-address"
・API_URL, API_KEY : kết nối đến Ethereum network. Ví dụ như bên dưới
API_URL = "https://eth-ropsten.alchemyapi.io/v2/GS9-WPWXWl4STCEb1-cKq8lSI89ErdDu"
API_KEY = "GS9-WPWXWl4STCEb1-cKq8lSI89ErdDu"
PRIVATE_KEY = "1f71ebbb8d0f3f36c443e8043dac5e379c71c4485c681cc2445c8c3c0bda454b"
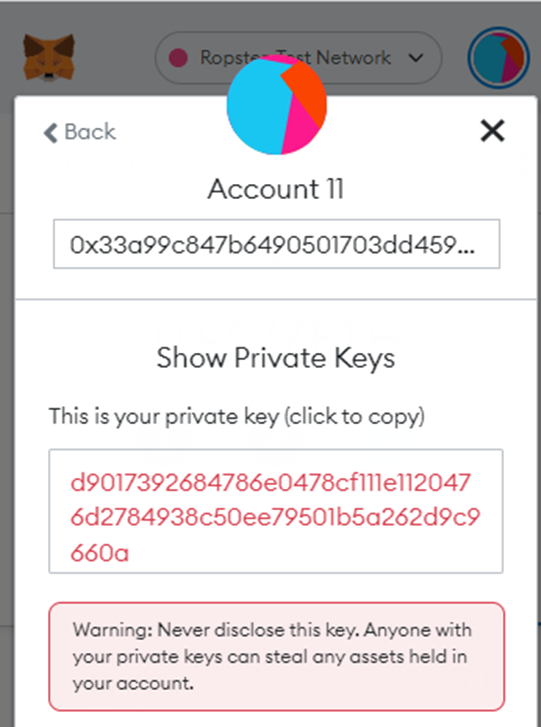
・PRIVATE_KEY : lấy từ Ethereum account (address)
2. Compile
Sau khi compile constract sẽ tạo ra file HelloWorld.json có các abi : như function constructor, update...
{
  "_format": "hh-sol-artifact-1",
  "contractName": "HelloWorld",
  "sourceName": "contracts/HelloWorld.sol",
  "abi": [
    {
      "inputs": [
        {
          "internalType": "string",
          "name": "initMessage",
          "type": "string"
        }
      ],
      "stateMutability": "nonpayable",
      "type": "constructor"
    },
    {
      "anonymous": false,
      "inputs": [
        {
          "indexed": false,
          "internalType": "string",
          "name": "oldStr",
          "type": "string"
        },
        {
          "indexed": false,
          "internalType": "string",
          "name": "newStr",
          "type": "string"
        }
      ],
      "name": "UpdatedMessages",
      "type": "event"
    },
    {
      "inputs": [],
      "name": "message",
      "outputs": [
        {
          "internalType": "string",
          "name": "",
          "type": "string"
        }
      ],
      "stateMutability": "view",
      "type": "function"
    },
    {
      "inputs": [
        {
          "internalType": "string",
          "name": "newMessage",
          "type": "string"
        }
      ],
      "name": "update",
      "outputs": [],
      "stateMutability": "nonpayable",
      "type": "function"
    }
  ],
  ...
}
3. Deploy
thực hiện run file deploy.js có nội dung như bên dưới
async function main() {
    const HelloWorld = await ethers.getContractFactory("HelloWorld");

    // Start deployment, returning a promise that resolves to a contract object
    const hello_world = await HelloWorld.deploy("Hello World!");
    console.log("Contract deployed to address:", hello_world.address);}

 main()
   .then(() => process.exit(0))
   .catch(error => {
     console.error(error);
     process.exit(1);
   });
=> Sau khi deploy ok sẽ tạo ra CONTRACT_ADDRESS. Ví dụ như bên dưới
CONTRACT_ADDRESS = "0xc8C82bf123644118B1C8bB01A881C66A8Ee72e5D"
Tóm lại để có được CONTRACT_ADDRESS thì cần các thông tin ví dụ như hình bên dưới
API_URL = "https://eth-ropsten.alchemyapi.io/v2/GS9-WPWXWl4STCEb1-cKq8lSI89ErdDu"
API_KEY = "GS9-WPWXWl4STCEb1-cKq8lSI89ErdDu"
PRIVATE_KEY = "1f71ebbb8d0f3f36c443e8043dac5e379c71c4485c681cc2445c8c3c0bda454b"
CONTRACT_ADDRESS = "0xc8C82bf123644118B1C8bB01A881C66A8Ee72e5D"
4. Tương tác Read/Update Message với Smart Contract
Trước khi tương tác với smart contract cần hiểu 3 khái niệm
・Provider : là một node provider cho phép quyền read, write đến blockchain.
・Signer : là Ethereum account có khả năng sign transactions.
・Contract : là object đại diện cho contract deployed on-chain.
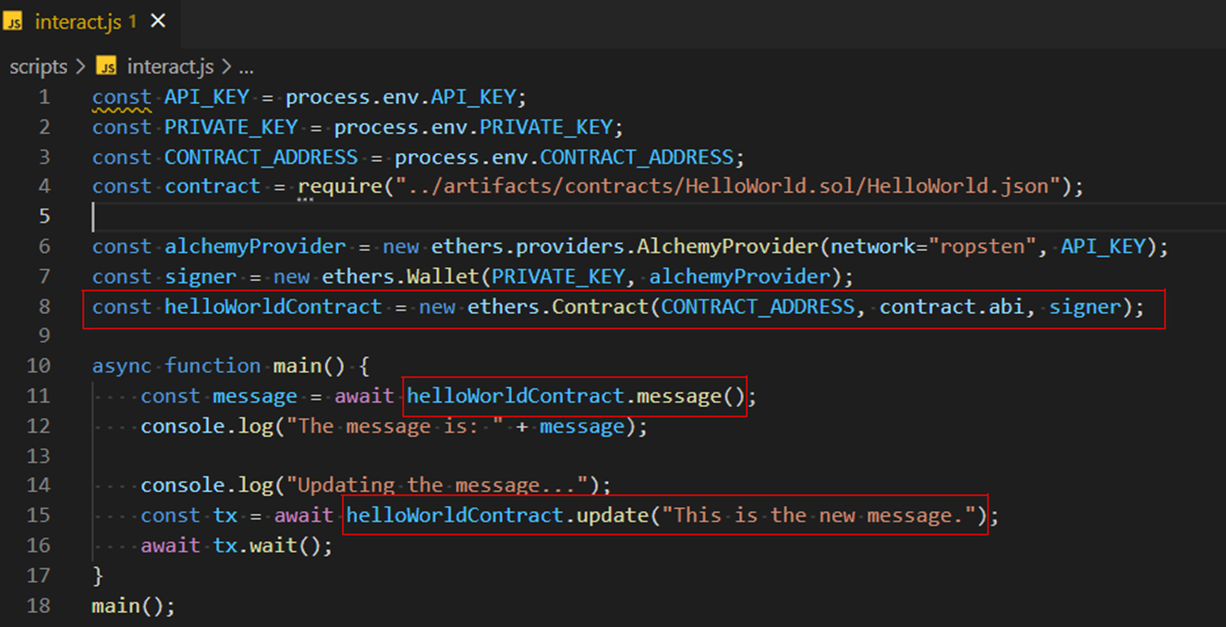
File interact.js chứa đầy đủ thông tin trong source.
require("dotenv").config();
const alchemyKey = process.env.REACT_APP_ALCHEMY_KEY;
const { createAlchemyWeb3 } = require("@alch/alchemy-web3");
const web3 = createAlchemyWeb3(alchemyKey);

const contractABI = require("../contract-abi.json");
const contractAddress = "0x6f3f635A9762B47954229Ea479b4541eAF402A6A";

export const helloWorldContract = new web3.eth.Contract(
  contractABI,
  contractAddress
);

export const loadCurrentMessage = async () => {
  const message = await helloWorldContract.methods.message().call();
  return message;
};

export const connectWallet = async () => {
  if (window.ethereum) {
    try {
      const addressArray = await window.ethereum.request({
        method: "eth_requestAccounts",
      });
      const obj = {
        status: "👆🏽 Write a message in the text-field above.",
        address: addressArray[0],
      };
      return obj;
    } catch (err) {
      return {
        address: "",
        status: "😥 " + err.message,
      };
    }
  } else {
    return {
      address: "",
      status: (
        <span>
          <p>
            {" "}
            🦊{" "}
            <a target="_blank" href={`https://metamask.io/download.html`}>
              You must install Metamask, a virtual Ethereum wallet, in your
              browser.
            </a>
          </p>
        </span>
      ),
    };
  }
};

export const getCurrentWalletConnected = async () => {
  if (window.ethereum) {
    try {
      const addressArray = await window.ethereum.request({
        method: "eth_accounts",
      });
      if (addressArray.length > 0) {
        return {
          address: addressArray[0],
          status: "👆🏽 Write a message in the text-field above.",
        };
      } else {
        return {
          address: "",
          status: "🦊 Connect to Metamask using the top right button.",
        };
      }
    } catch (err) {
      return {
        address: "",
        status: "😥 " + err.message,
      };
    }
  } else {
    return {
      address: "",
      status: (
        <span>
          <p>
            {" "}
            🦊{" "}
            <a target="_blank" href={`https://metamask.io/download.html`}>
              You must install Metamask, a virtual Ethereum wallet, in your
              browser.
            </a>
          </p>
        </span>
      ),
    };
  }
};

export const updateMessage = async (address, message) => {
  //input error handling
  if (!window.ethereum || address === null) {
    return {
      status:
        "💡 Connect your Metamask wallet to update the message on the blockchain.",
    };
  }

  if (message.trim() === "") {
    return {
      status: "❌ Your message cannot be an empty string.",
    };
  }
  //set up transaction parameters
  const transactionParameters = {
    to: contractAddress, // Required except during contract publications.
    from: address, // must match user's active address.
    data: helloWorldContract.methods.update(message).encodeABI(),
  };

  //sign the transaction
  try {
    const txHash = await window.ethereum.request({
      method: "eth_sendTransaction",
      params: [transactionParameters],
    });
    return {
      status: (
        <span>
          ✅{" "}
          <a target="_blank" href={`https://ropsten.etherscan.io/tx/${txHash}`}>
            View the status of your transaction on Etherscan!
          </a>
          <br />
          ℹ️ Once the transaction is verified by the network, the message will
          be updated automatically.
        </span>
      ),
    };
  } catch (error) {
    return {
      status: "😥 " + error.message,
    };
  }
};